Tuesday, October 5, 2010

Dinner Salad for the End of the Summer

New Wave Salad
I am always seeking out one-dish meals. And this one is absolutely perfect for the end-of-season gorgeous crops of basil, tomatoes and green beans.


1½ cups Red Wine Basil Vinaigrette (see recipe below)
1 pound tender green beans, stringed and cut into thirds
1 tablespoon olive oil
10-12 ounces dried fettuccine or linguine, broken in half
1 cup fresh basil leaves
6 ripe tomatoes, seeded, cut into 1-inch chunks
1 cup pitted Kalamata olives
2 tablespoons chopped fresh parsley
4 ounces Parmesan cheese, in one piece

1. Prepare the Red Wine Basil Vinaigrette.
2. Bring a large pot of salted water to a boil. Add the beans and simmer until just tender, about 5 minutes. Scoop out of the pot, leaving the boiling water. Drain, rinse under cold water, drain again, and set aside.
3. In the same boiling water, add the oil and fettuccine and cook at a rolling boil until just tender. Drain, rise under cold water, and drain again. Turn out onto a clean dry dishtowel and pat dry. Place in a large serving bowl. Add ½ cup of the vinaigrette and toss well. Set aside.
4. Arrange the basil leaves in small stacks and roll them lengthwise. Slice the stacks diagonally into slivers.
5. Cover the pasta with the green beans and tomatoes, followed by the black olives and slivered basil. Sprinkle with parsley and pour the remaining 1 cup vinaigrette over the salad. Toss gently.
6. Scrape the Parmesan with a vegetable peeler to make thin wide shavings. Place them on top of the salad. When serving, try to distribute a good mix of the ingredients on each plate. You may want to put the parmesan and the peeler on the table so that you can serve yourself more if you’d like.

4 servings as a one-dish meal
Adapted from Julee Rosso and Sheila Lukins’ The New Basics

Red Wine Basil Vinaigrette

2 cloves garlic, pressed
1 tablespoon Dijon mustard
1/3 cup red wine vinegar
1 teaspoon salt
1 teaspoon black pepper
½ teaspoon sugar
1 cup olive oil
½ cup slivered fresh basil leaves
½ cup chopped fresh parsley

1. Combine the garlic, mustard, vinegar, salt, pepper and sugar in a small bowl and whisk well.
2. Add the oil in a slow stream, whisking constantly until the vinaigrette has thickened slightly. Fold in the basil and parsley. Taste for seasonings and adjust as you see fit.

Makes 1½ cups
Adapted from Julee Rosso and Sheila Lukins’ The New Basics

"To market, to market to buy a fat pig"--Nearly Impossible

Pork Piccata
This is an old stand-by because it is fast and delicious. But I have had problems with it in the last couple of years as the pork we get is leaner and leaner--perhaps good for our health--but definitely not as succulent and juicy. So I've tried to find less lean pork (I bought part of a piggy which had been raised organically by students at Sonoma Valley High School and it worked really well) and cook it as short a time as possible.


1½ pounds pork butt or boneless pork chops, sliced ¼ to ½-inch thin
Note: I look for pork that has some marbling of fat in the meat. Boneless pork chops work well if they have some fat in the meat. If it is too lean, the meat dries out in an instant.
¼ teaspoon pepper
1 teaspoon salt
½ cup flour
3 tablespoons olive oil
4 garlic cloves, slivered
Note: You can use more garlic if you are a true garlic-lover.
Zest of 1 lemon, zester or microplane but I prefer the zester
Juice of 1 lemon
¾ cup white wine
2 tablespoons capers
3 tablespoons chopped flat leaf parsley

1. This dish cooks so fast, you really need to have all the ingredients prepped and set to go before you start cooking. So sliver the garlic, zest the lemon, juice it, measure the capers and the white wine, and chop the parsley. There, you’re set.
2. Mix the salt, pepper and the flour in a clean plastic sack. Dredge the pork a few slices at a time and lay in a single layer on a plate. Sprinkle with more salt and pepper.
3. In a large frying pan, heat the olive oil. Add the garlic and fry until lightly brown. Remove it from the pan and set aside, leaving as much of the oil as possible.
4. In the same oil, lightly brown the pork slices on both sides in one or more batches, about 1 minute on each side or a little longer if the meat is thicker. Remove the pork from the pan as it finishes. The meat will continue to cook while it sits.
5. Add the lemon juice, white wine, capers, lemon zest and reserved garlic to the pan, set over medium heat, scraping up any browned bits in the pan. Reduce the sauce for just a moment, taste for seasonings and adjust as you see fit.
6. Return the meat to the pan for a minute, shaking the pan a bit so that the sauce is thickened by the flour on the meat. The meat should be slightly pink in the middle.
7. Place on warmed plates or a serving platter. Sprinkle with parsley and serve immediately.

4-6servings
Adapted from Jeff Smith’s The Frugal Gourmet

Here is what a zester looks like:


You might to add the following dishes  to make a wonderful supper:


Oven-roasted Zucchini
From my May 31, 2009 blog


Coconut Rice from my July 27, 2009 blog. It looks just like any other rice dish so I haven't included a photo.


A Sweet Potato Side Dish

Glazed Sweet Potatoes
This really sounds like an American Thanksgiving dish with everything except the mini-marshmallows. It is so good with roasted chicken or pork. But given its heritage (South African), it is delicious with Bobotie, South Africa’s amazing meatloaf, which you can find on my May 31, 2009 blog.


2 pounds sweet potatoes, peeled and cubed½ cup water
2 sticks of cinnamon or ½ teaspoon ground cinnamon
2-3 strips of orange peel
3 tablespoons butter
1/3 cup brown sugar
1 teaspoon grated fresh ginger
¼ teaspoon ground ginger
1 teaspoon salt, more to taste
¼ cup sherry, dry or medium

1. Combine the sweet potatoes, water, cinnamon, orange peel, butter, sugar, both gingers, and salt in a saucepan. Cover and simmer for about 10 minutes until the potatoes are almost tender.
2. Pour the liquid from the potatoes into a small saucepan. Add the sherry. Bring it to a boil and cook until it is reduced to a thin flavorful syrup.
3. Return the liquid to the potatoes and cook gently until the potatoes are soft, turning them carefully to coat with the sauce. Shake the pot from time to time to prevent the potatoes from sticking to the pan. Taste for seasonings and adjust as you see fit.
4. Transfer the sweet potatoes to a warm bowl and serve.

6 servings
Adapted from Lannice Snyman’s Rainbow Cuisine: A Culinary Journey Through South Africa

Roasted Chicken 
 From my May 19, 2010 blog.


Boboti 
From my May 31, 2009 blog.


Indian-Style Broccoli
From my May 19, 2010 blog.

Sunday, October 3, 2010

Back to Blogging

I have been absorbed these last five weeks--probably just like you--in some vacation/family travel and in some household cleaning out and refurbishing. In the travels I had to chance to cook and photograph some of the "keepers" which I have been wanting to share with you. Coastal South Carolina has really good seafood. Although I don't eat tuna more than a couple of times a year--I would love to have someone tell me that my concern about the mercury content was bogus--I suspect it is not. But occasionally I just love a nicely cooked tuna dish and the one I give you below is just wonderful and easy as well.


Chilled Almond Gazpacho with Grapes (Ajo Blanco con Uvaas)
This makes a great first course soup for a dinner party. It wouldn’t quite work as a whole meal. You could serve it in small mugs or tiny bowls while your guests are standing around the kitchen, working up an appetite. I must admit that it is not to everyone’s liking. But I find it delicious, refreshing, and anything but ordinary. I think you will too.


6 ounces stale bread, crusts removed
1 cup slivered almonds
3 garlic cloves, peeled
½ cup extra virgin olive oil
5 tablespoons white wine vinegar
2 teaspoons salt or to taste
2-3 cups water, but start with 2 cups
Red or green seedless grapes, cut in half
OR
Roasted Grapes (see my August 13, 2009 blog)

1. Soak the bread in water to cover until it is softened, about 15 minutes. Squeeze the bread to remove some of the water.
2. Put the garlic in a small frying pan with a small amount of oil. Roast slowly over low or low-medium heat until they are soft and slightly browned, about 10 minutes. Be careful not to let them char.
Note: It is easiest to do this next step in two or three batches, depending on the size of your blender or food processor. A blender will give you a smoother consistency.
3. Measure the almonds, olive oil, water, vinegar, and salt. Take some of each, plus some garlic, and place them in a blender or food processor. Blend until very smooth. As you finish each batch, pour it into a bowl large enough to hold all your batches. Stir them together.
4. Add additional water until it is the soupy consistency you like. Check for seasonings and adjust as you see fit.
5. Chill. Right before serving, stir the soup, ladle into bowls and garnish with grapes.

6 servings
Adapted from Janet Mendel’s My Kitchen in Spain

Tuna Steaks with Onion Marmalade


4 center-cut tuna steaks, about 6 ounces each
2 tablespoons olive oil
2 teaspoons salt or to taste
3 tablespoons fresh thyme leaves or 2 teaspoons dried thyme
¼ teaspoon red-pepper flakes
2 teaspoons coarsely cracked black peppercorns
2 tablespoons chopped fresh basil or fresh parsley
Onion Marmalade (see recipe below)

1. Place the tuna steaks on a flat surface and cut out the dark streak of meat, if any. Brush with olive oil on both sides and sprinkle with salt, thyme, pepper flakes, and peppercorns. Cover with plastic wrap and let stand for 15 minutes before cooking.
2. You have a choice as to cooking method: grilling, broiling, or pan searing.
3. If you are using a grill, preheat the grill and rub the rack lightly with oil. Place the fish on the grill. Cook for 3 minutes, turn, and cook for another 3 minutes. The fish should have a nice streak of pink in the middle.
OR
If you are using a broiler, preheat the broiler and place the fish on a rack about 4 inches from the heat. Cook for 3 minutes, turn, and cook for another 3 minutes. The fish should have a nice streak of pink in the middle.
OR
If you are pan frying, heat 1-2 tablespoons of oil in a pan over high heat. When it is hot, add the fish and cook for 3-4 minutes on each side. The fish should have a nice streak of pink in the middle.
Whichever method you choose, adjust cooking time to the thickness of the fish and to your taste—but try not to over cook.
4. Place each tuna steak on a warm plate, with the Onion Marmalade. Sprinkle the tuna with the chopped basil or parsley.

4 servings
Adapted from a 60-Minute Gourmet column in the Raleigh News and Observer

Onion Marmalade


4 red onions, peeled and thinly sliced
2 tablespoons olive oil
2 tablespoons red wine vinegar
1 whole clove
¼ teaspoon Tabasco sauce
salt to taste
2 tablespoons drained capers
2 tablespoons honey

1. Heat the olive oil in a sauté pan and add the onions. Cover and cook over medium-high heat for 15 minutes, stirring occasionally. When the onions start to brown, uncover and add the vinegar, clove, Tabasco and salt to taste. Cook briefly, stirring, until the vinegar has almost evaporated.
2. Stir in the capers and honey. Cover tightly and simmer for 15 minutes more. Taste for seasonings and adjust as needed. Set aside.
3. Rewarm if necessary before serving.

6 servings
Adapted from a 60-Minute Gourmet column in the Raleigh News and Observer

You could add the following dishes to this menu and have yourself a splendid dinner party:

Roasted Potatoes
From my June 27, 2009 blog


Sautéed Spinach
From my May 31, 2010 blog


And a wonderful dessert of your choosing. Mmmmm.

Monday, August 23, 2010

Visiting Goats in Michigan

Over the last couple of years I have become very fond of goats. I was introduced to them in Albuquerque by Susan Main who spent some time last fall at the South Mountain Dairy (“It’s all about the girls!”) helping the two women who own the place with milking, feeding and cheese-making. She has been making regular trips to the goat exhibit at the state fair for years and is a far more advanced goat fancier than I. But I am on my way.


Little did I know that on my trip to Michigan this year I would have another chance to visit some goats. On our way home from the Farmers Market in Montague, we decided to stop by a farm that our friends said had five goats, all female, ranging in age from a couple of months to several years. One of the little ones is bow-legged.

We were welcomed by the three boys Jake, Silas, and Clay who help to tend the goats and by their mom, Jennifer. For a while we chatted over the electrified fence: boys and goats on one side, me on the other. At last the boys invited me into the pen. I was thrilled.


After plying the boys with questions and snapping a few more pictures, we moved across the road to see the chickens and ducks and bought a 5.4 pound chicken ($2 a pound) they had recently slaughtered--Jennifer was in charge of gutting all 25 chickens, an experience she doesn’t want to repeat--and a dozen eggs, four of which were from the ducks ($2 a dozen).


When I returned to Sonoma, a large box was waiting for me on my front stoop. It contained three goats, two big ones and a little one, fashioned, I think, from recycled oil drums. These adorable creatures look out over our freshly planted front yard. Every morning I check in with them. Most folks walking by smile when they spot them lurking in the shadows. Our next door neighbor's dog sniffs them and barks. Children can't quite believe it. It's fun to watch the reactions. So here where it stands: I hang out with the live ones when I can. The rest of the time the faux goats will do very well indeed, bringing pleasure to one and all.

Menu 19: Summer Supper

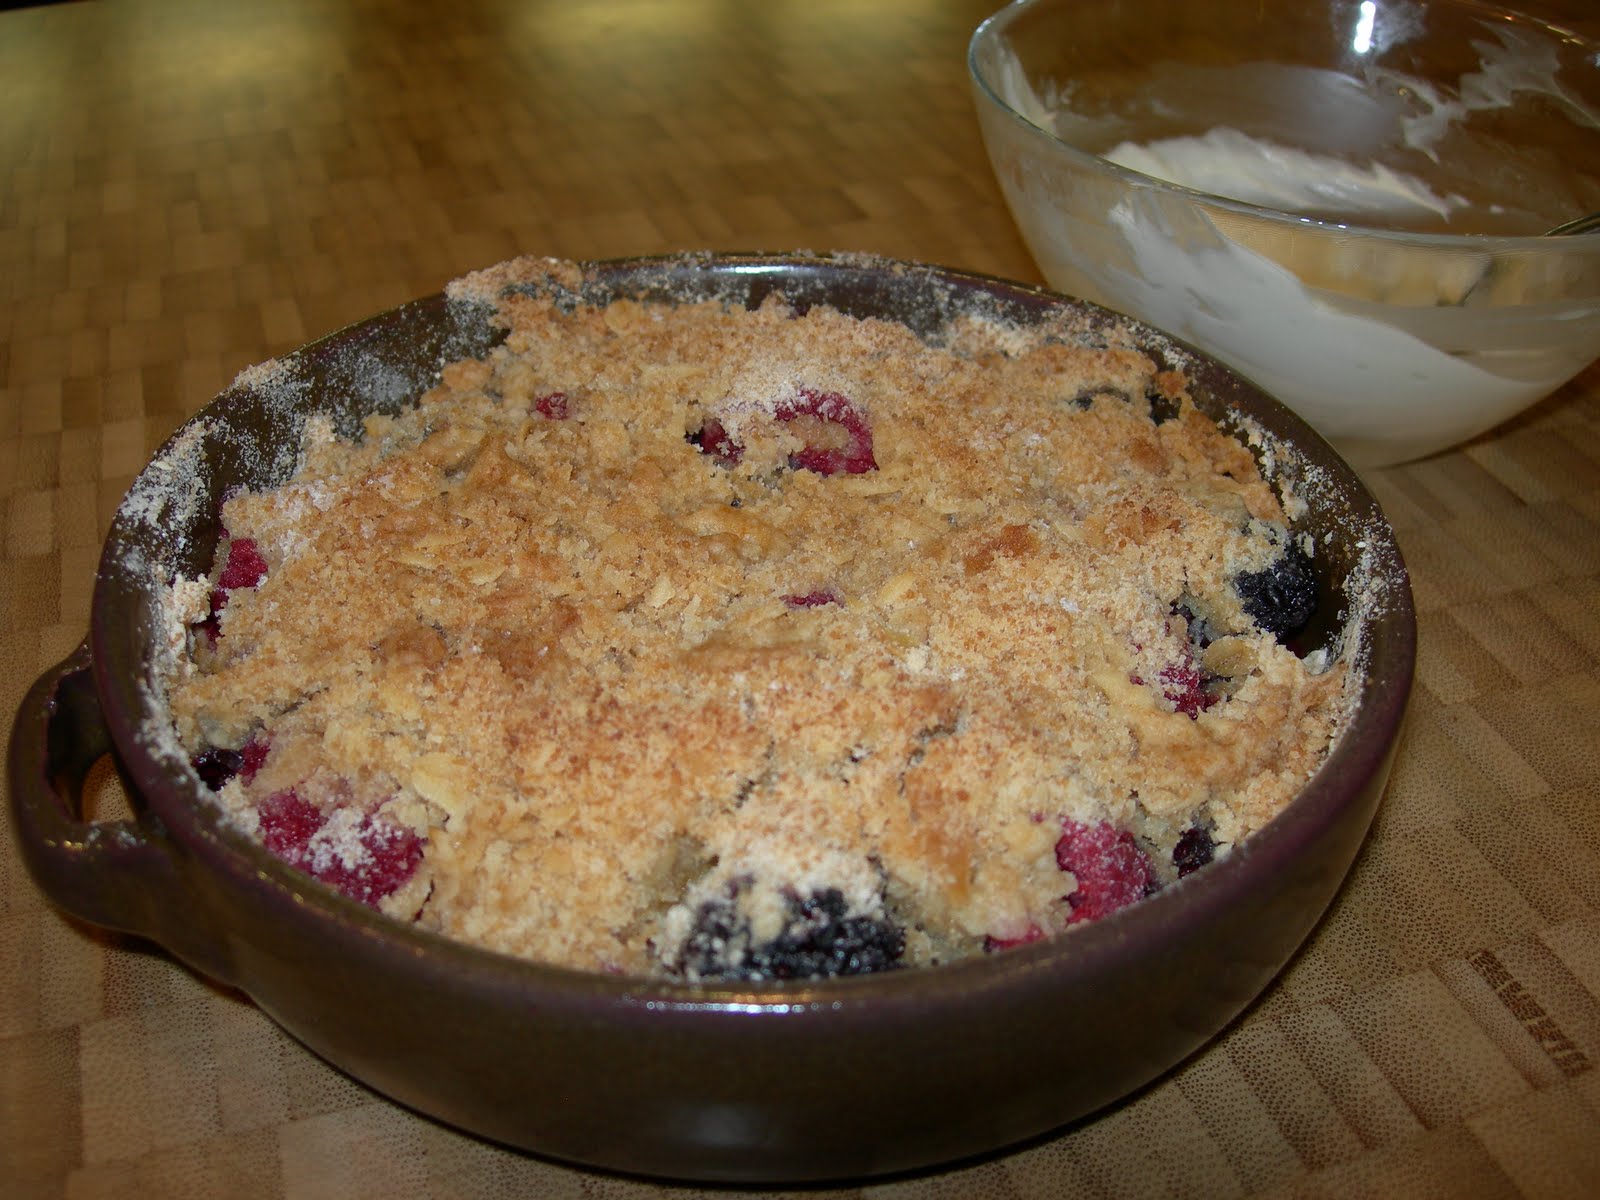
A quiche all creamy and full of spinach, a zucchini salad with the tantalizing flavors of Provence, followed by a Lemon Ice (from the market or check out my March 22, 2011 blog). Seems like a pretty perfect summer supper to me.

Spinach Quiche
I love this quiche and I don’t care whether quiches are in or out of fashion. If you are not up for making a pie crust, buy one. If you are not up for a pie crust of any kind, make this quiche without one. I have a friend who actually prefers it that way.


1 partially baked 8-9 inch pie shell (Recipe below) or purchase one from the supermarket.
Note: If the supermarket one comes unbaked, follow the instructions on the wrapper for partial baking or look to the recipe below.

2 tablespoons butter
½ onion, chopped
4 cups finely chopped spinach or 1 package frozen chopped spinach, thawed and squeezed dry
1 teaspoon salt
1/8 teaspoon pepper
¼ teaspoon nutmeg
¼ teaspoon smoky sweet paprika
1 cup grated cheese, whatever you like or have on hand cheddar, Swiss, Parmesan or a mix
1¼ cups heavy cream, warmed in the microwave
4 eggs, lightly beaten

1. Preheat oven to 375ºF.
2. Melt the butter in a large skillet and sauté the onion until tender but not browned.
3. Add the spinach, cover and cook for 5 minutes. If you use fresh, you’ll need to chop again. No need to do that if you use frozen. Add the salt, pepper, nutmeg, paprika, and ½ cup cheese.
4. Pour the warm cream slowly over the eggs while beating. Gradually beat in the spinach mixture. Taste for seasonings. Ladle into the pie shell. Sprinkle with the remaining cheese.
5. Bake for 30 minutes or until set. It will take longer for larger pies—45 minutes perhaps. Let sit for 15-20 minutes before serving. Serve warm.

Notes:
For a bigger pie shell, increase the cream to 1¾ cups and the eggs to 5.
If you make this quiche ahead of time (the day or the morning before serving), refrigerate and then reheat at 300ºF. for 20-30 minutes to warm it slightly.

6 servings
Adapted from Craig Claiborne’s The New York Times Menu Cookbook

Pie Crust

For an 8 or 9-inch pie plate or tin:
2 cups flour
1 teaspoon salt
½ cup plus 3 tablespoons (1 stick plus 3 tablespoons) cold unsalted butter, cut roughly into ½-inch pieces
7 tablespoons ice water or more if necessary

1. Combine the flour and salt in the container of a food processor. Add the butter and pulse until the butter and flour are blended and the mixture looks like cornmeal, about 10 seconds.
2. Add the ice water to the mixture. Pulse until you see the mixture coming together. If it doesn’t after a couple of additional pulses, add more ice water, 1 tablespoon at a time, until it does.
3. Dump the contents of the container onto a sheet of plastic wrap and mold it into a ball. Flatten the ballot a disk; bring the plastic up around the dough to cover it completely. Either freeze for 10 minutes or refrigerate for 30 minutes. (You can also refrigerate the dough for a day or two or freeze it almost indefinitely. If frozen, defrost before rolling.)
 4. Sprinkle a smooth countertop or a large board with flour. Unwrap the dough and place it on the work surface; sprinkle the top with a little flour. If the dough is hard, let it rest a few minutes to warm up just a little.
5. Roll with light pressure, from the center out. Continue to roll, adding a small amount of flour as necessary, rotating the dough occasionally, and turning it over once or twice during the process. When the dough is about 1/8-inch thick, place your plate upside down over it to check the size. You want your circle of dough to be about 2-3 inches bigger than the plate it will go into.
6. If the size is correct, move the dough into the pan by folding the dough in half and placing the fold in the middle of the pan. Carefully unfold the dough and press it gently into the outer edge of the plate.
7. Trim (I use scissors) the extra dough about 1 inch above the rim. Fold the dough above the rim in half (to ½ inch) and crimp with your fingers to make a decorative edge. With the scraps, you can fill in any part of the circle that’s missing.
8. Place the plate in the freezer for 10 minutes or the refrigerator for 30 minutes.

Partially Baked Pie Crust

1. Preheat the oven to 400ºF.
2. Prick the dough all over with a fork to help prevent the crust from poufing. (You’ll see what I mean when it happens.)
3. Tear off a large piece of aluminum foil. Press the sheet into the dough, especially on the sides. Weight the foil with a pile of dried beans or rice, pie weights, or a tight-fitting oven-proof skillet or saucepan—anything that will sit flat on the surface and hold the dough in place. Sometimes I just do the foil and don’t weight it with anything and it’s just fine.
4. Bake for 12 minutes. Remove from the oven; remove the weights and foil. If it has poufed, wait for a few minutes for it to settle and then prick the bottom, once again, with a fork.
5. Bake for another 4-5 minutes or so until the crust is just starting to turn a light brown and the bottom looks set.
6. Remove from the oven and cool on a rack.

Adapted from Mark Bittman’s How to Cook Everything: Simple Recipes for Great Food, Julia Child’s Mastering the Art of French Cooking and M.F.K. Fisher’s The Cooking of Provincial France

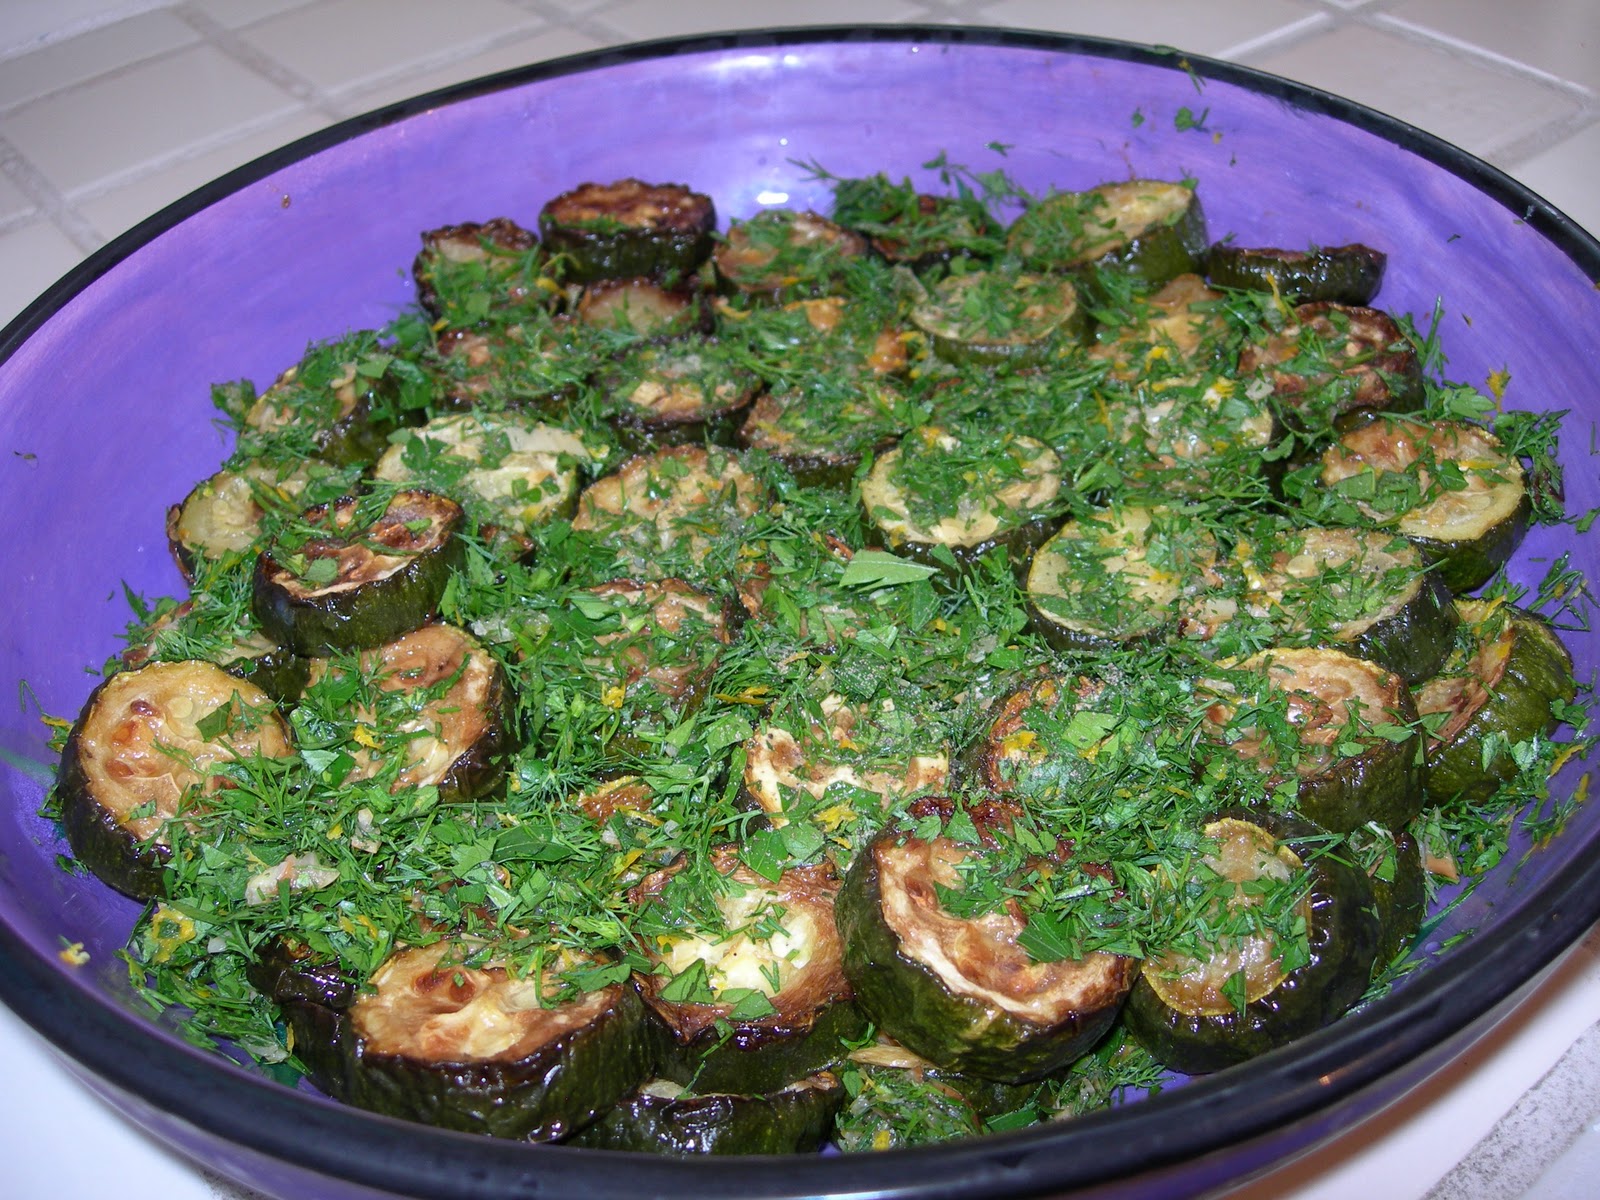
Green and/or Yellow Zucchini Salad with Feta (also Summer Squash)


1¼ pounds squash of your choosing, roasted (see recipe below)
½ cup drained and chopped oil-packed sun-dried tomatoes
OR
½ cup dried sun-dried tomatoes (not packed in oil), chopped
½ cup pitted and sliced Kalamata or Nicoise olives
1 red bell pepper, chopped
2 tablespoons chopped shallots or green onions
1 tablespoon chopped fresh basil or more if you’d like
1 tablespoon chopped fresh mint or more if you’d like
6 tablespoons olive oil
3 tablespoons raspberry or red wine vinegar
1 tablespoon honey
Salt and pepper to taste
3 ounces crumbled feta cheese

Roasting the squash:
1. Cut into ½ -inch slices.
2. Place on a rimmed baking pan and mix with 2 tablespoons olive oil and some salt and pepper.
3. Roast at 425ºF. for about 30-40 minutes turning them mid-way. They should be nice and brown on both sides. Let cool slightly before continuing with the rest of the salad.

Making the salad:
1. In a medium bowl, combine all the remaining ingredients, except the feta. You can do this while the squash is roasting. Add salt and pepper to your taste.
2. In a serving bowl, layer the cooled squash with the other combined ingredients. Sprinkle the top with feta cheese.
3. Serve at room temperature. If you make it ahead, refrigerate until about an hour before serving.

4 servings
Adapted from John Ash’s From the Earth to the Table

Friday, August 13, 2010

Menu 18: Summer at Its Best

This is a really wonderful summertime menu. Spicy Shrimp with Garlic and Oil, a loaf of crusty bread, your favorite salad or the Cherry Tomato, Mozzarella, and Corn Salad on my June 27, 2009 blog, with a delicious Berry Crumble for dessert. If you want to fancy it up a bit, you could add a first course of cold Yogurt and Cucumber Soup from my August 3, 2009 blog. Happy eating.

Spicy Shrimp with Garlic and Oil
I love the ease of cooking shrimp in their shells. Peeling and deveining shrimp is not one of my favorite kitchen activities. But I also love sucking the juices off the shrimp before peeling them at the table. And the peeling them myself slows me down and makes me anticipate and then fully appreciate their luscious flavor.


1 pound large or medium shrimp, in their shells
1/3 cup olive oil
6 cloves garlic or more if you are a garlic lover, slivered
1 tablespoon fresh thyme leaves
¼ teaspoon crushed red peppers or ½ teaspoon smoky hot paprika
½ teaspoon salt or to taste
2 tablespoons chopped flat leaf parsley

1. Rinse the shrimp and pat them dry.
2. In a skillet large enough to hold all the shrimp in a single layer, heat the oil over moderately high heat. When the oil is hot but not smoking, add the garlic, thyme, crushed red peppers or paprika, salt and shrimp. Toss to coat with oil, cook, stirring occasionally, just until the shrimp are pink, 4 to 5 minutes.
3. Remove the pan from the heat, and with a slotted spoon, transfer the shrimp to a warmed serving platter or to warmed individual plates. Pour the sauce over the shrimp, sprinkle lightly with the parsley. Serve immediately with paper napkins and plenty of bread to sop up the sauce.

3-4 servings for dinner
Adapted from Patricia Wells’ Trattoria

Individual Blackberry Crumbles
I wanted to include this recipe before berries left the Farmers' Markets around the country. Right now in Sonoma, blackberries from Andrea Davis' stand at the Friday market are at their prime but she's worried that the cold weather we've been having may slow down the ripening and sweetening. You'll remember her from my October 8, 2009 blog about her Quarter Acre Farm. Let's hope we have a spell of hot weather so those berries continue to thrive. And the tomatoes.


3 cups blackberries or comparable amount of blueberries or raspberries or a mix of all three
2 tablespoons sugar
1 cup flour plus 1 tablespoon
½ cup firmly-packed brown sugar
½ teaspoon salt
1 teaspoon baking powder
3 tablespoons oats (quick-cooking or regular)
2 tablespoons chopped candied ginger
6 tablespoons butter, cut into small pieces
Serve with vanilla ice cream, lightly sweetened whipped cream, crème fraiche or mascarpone mixed with a little sugar and milk or cream.

1. Place the berries, sugar and 1 tablespoon flour in a bowl and stir to mix. Divide the berries into four shallow ovenproof bowls.
2. Place the brown sugar, baking powder, salt, oats, and remaining flour in a bowl (you can use the same berry bowl) and mix well. Add the butter, rubbing it in with your fingers until the mixture resembles coarse breadcrumbs. You can also use a pastry cutter.
3. Sprinkle the berries with this mixture. Bake at 400ºF. for 20-25 minutes until golden brown and bubbling. Serve warm with one of the suggested toppings.
You can make this in one larger container, such as a gratin dish, without any changes.

4 servings
Adapted from Bill Granger’s Sydney Food

Thursday, July 29, 2010

Bali: The End or the Beginning

So I have reached the end of the Bali blogs. As you can tell, it was a terrific trip, full of fun and adventures, many of which I have now written up.  It was also deeply restful, especially so because, after the first few posts, I decided not to blog and instead to enjoy the experience fully, without getting near a computer. It was the right decision. We walked, sat by the pool, looked at the ocean and read good books. We went to a Balinese healer for some body work and to a Balinese holy man for some spiritual guidance. We enjoyed our time with Ben and Stephanie so much. We loved doing all the things I've now shared with you. And yes, to say it one more time, the food, oh the food, was just superb.

Just in case you're wondering, we stayed at two small boutique hotels that were just wonderful and very reasonably priced. We would highly recommend them. Alila Ubud is in the central part of the country; Alila Manggis is on the southeastern coast.

You can read the Bali posts any way you like, top down or bottom up. If you do the bottom up, which will give you a better sense of the trip's narrative flow, move yourself down to June 26 and read backwards to the top.

In many of these posts, I've kept the photographs small because there were so many I wanted to include. On most computers, you can click on the photos to make them bigger if you want to check out the details.

One last picture. Ahhhhh.

July 6, 2010 Manggis, Bali: Cooking Class at the Organic Garden

The cooking class was held in an open-air room with a thatched roof. Everyone in the class had a workstation with a burner, ulekan grinding stone, a packet of recipes, and small dishes of ingredients. We were glad to be in a covered space because mid-way through the class the heavens opened and it poured down rain. We were quite snug. Did I mention that I was the lone American in the group? Eight Australians and me.

Chef Santika opened the class with explanations of the ingredients we would be using for our lunch: the various kinds of rice and beans and the vegetables that would comprise Bumbu Bali.

Pak Sugita built a fire in the stove over which several of our dishes would cook.

We were set.

We started the class by making Bumbu Bali. Most of the ingredients are pictured here. Check my Bumbu Bali blog posted on July 29 and dated July 2 for lots of information about this useful paste, used to create so many Balinese dishes. Once it was simmering, we proceeded to prepare our lunch, carefully walked through the process by Santika.

Sate lilit babi, Pork Sate on Lemongrass. This version of sate is made with ground pork and mixed with fried shallots, garlic, Bumbu Bali, coconut milk and lime juice. The mixture is wrapped around the end of a stalk of lemongrass and is grilled. There is a special method which Santika demonstrated to make sure the meat stays on the stalk. Soooo good and so much fun to eat.


Tum ayam, Spiced Chicken Parcels. Ever-useful banana leaves are used to wrap up the mixture of chopped chicken coconut, Bumbu Bali, coconut milk, shallots, lemon basil, and lime juice. We put the little packets in the basket of a steamer which was sitting on the fire place. A great mixture. I could imagine making little packets out of aluminum foil—given the fact that banana leaves are not readily available. Why didn't I take a picture of what was inside?


Lawar don tabie bun, Bali Pepper Leaf with Grated Coconut and Red Beans. Spinach, bean sprouts or snow peas could be substituted for the Bali pepper leaves which are not readily available outside Bali. The greens are blanched, cooled, and mixed with grated coconut, fried chiles, shallots, and garlic, lime juice, and cooked red or black beans.

Tumis jepang, Stir-fried Choko (what we would call Chayote). Sliced chayote, red chiles, and garlic are sautéed in coconut oil. Stock, fish sauce, and oyster sauce are added and when everything is cooked, some sweet potato leaves or spinach are stirred in just before serving.

Nasi goreng, Balinese Fried Red Rice. This was the very same recipe we cooked in the first class except that this time we used cooked red rice. You can see how we left the coconut bowls resting gently over the mounds of rice to keep the bugs away while we finished preparing the lunch.

We had two sweets which the chef’s two assistants provided for us:
Urab sele, Sweet Potato Salad with Grated Coconut. It really wasn’t a salad in our sense of the word. It was several slices of boiled sweet potatoes, sprinkled with grated coconut and drizzled with palm sugar.
Lak lak, Tiny Rice Cakes. They were cooked in terracotta over the fire and served with fresh coconut and palm sugar.

It was a fantastic lunch, perhaps even better than the first cooking class lunch.

July 6, 2010 Manggis, Bali: The Organic Garden


I signed up for a second cooking class on our last full day in Bali. Ben and Stephanie had taken off on July 5th to adventure on their own, with plans to go to Lombok, a mostly-Muslim island a few hours away by boat, and then onto one of Lombok’s tiny off shore islands called Gili Air.

Our teacher, as with the previous class, was the executive chef of the hotel, Nyoman Santika. This time, rather than being taught at the hotel, the class was given on the site of the hotel’s small organic garden, a beautiful plot of land not far from the hotel.

My eight cooking mates were all Australian, six of them from one family. We were a very congenial group.

We were met at the entrance to the garden by the head gardener, Pak Sugita, whose spirit of welcome permeates the place. He showed us around his garden which grows lots of the roots used in Bumbu Bali as well as Kemangi (lemon basil) and purple basil, pandan (a leaf that is used as a flavoring in sweet dishes), mint, eggplant, corn, peppers, peanuts and a cinnamon tree. Thankfully there were many painted signs saying what was growing. The hotel uses as much as the garden can produce and has aspirations to increase the size of the property as it becomes available.


 Because it is adjacent to rice fields which receive significant doses of chemicals during the growing season, there is always danger that some of the water which floods these paddies will seep into the ground water and affect the organic garden. There is not much that Pak or the hotel can do until the awareness of the benefits of “organic” becomes more prevalent.

Luxuriating in the Tropical Fruits of Bali

The array of fruits in a tropical paradise is truly astonishing. I tried as many as I could and photographed most of them. Let me run them down for you.

Banana flowers. I saw them growing and was able to try them in a dish called Pusah bin mesantan, Banana Flowers with Fresh Coconut Milk and Balinese Spice. I found them in Berkeley at the Berkeley Bowl just in case I get a hankering for them.

Durian, the so-called stinky fruit, isn’t allowed in most public places. However, the ones that I spotted in Bali were at a roadside store comparable to a 7-Eleven. So go figure. There was no distinctive odor to them. They seem to have strong advocates—but most people say that it is an acquired taste. Perhaps more accurately an acquired smell.

Jackfruit is a very starchy fruit and can be used both cooked and uncooked. In salad form I had Lawar bebek which is Young Papaya and Jackfruit with Shredded Duck. We made Kare tahu dan tempe, Curry of Tofu and Soybean Cake in the first cooking class and included jackfruit which we had purchased earlier in the market.


Mangosteens are housed in a purplish shell which needs to be cracked open to reveal a soft garlic clove-shaped fruit with the texture of a lichee and a similar flavor. They are just delicious to eat out of hand, as Stephanie will attest.

Passion fruit, on the right side of the plate, looks a lot like a greenish orange on the outside. But once you break it open, it is quite different indeed. Filled mostly with black seeds held together with a mucous-like substance, they are far more tasty than they seem at first glance and are well worth a try. The hotel spa gave us small glasses of passion fruit sorbet following massages our last day in Bali. It was perfect.

A red pineapple was growing at the side of the water channel on our trek through the rice paddies. I would never have expected to see a pineapple growing in that location, much less a red one. But there you are.

Snake fruit in the lower left hand corner of the plate has a brownish mottled crackly skin which is easily peeled. You can  barely see it in the photo so you'll have to trust me that you can tell immediately why it is called a snake fruit. The lobed fruit sections inside are sweet with a texture somewhat akin to an apple.

Small pink water apples appeared on the grounds of our hotel one morning after a windy storm moved through during the night. Made, our guide from the Ubud hotel, had explained that they were the fruit of choice for kids when he was growing up, but once Washington State apples started being imported, the kids spurned the water apples for the imports.

Watermelons, cantaloupes, papayas, bananas, and regular golden pineapples are all readily available and were served to us every morning for breakfast, along with the more exotic fare. Mangos grow in Bali but were out of season so we didn’t see a one. This bowl of fruit was our dessert the last night---along with coconut milk ice cream.